Quick start
Section titled “Quick start”- Connect the device in Emu.
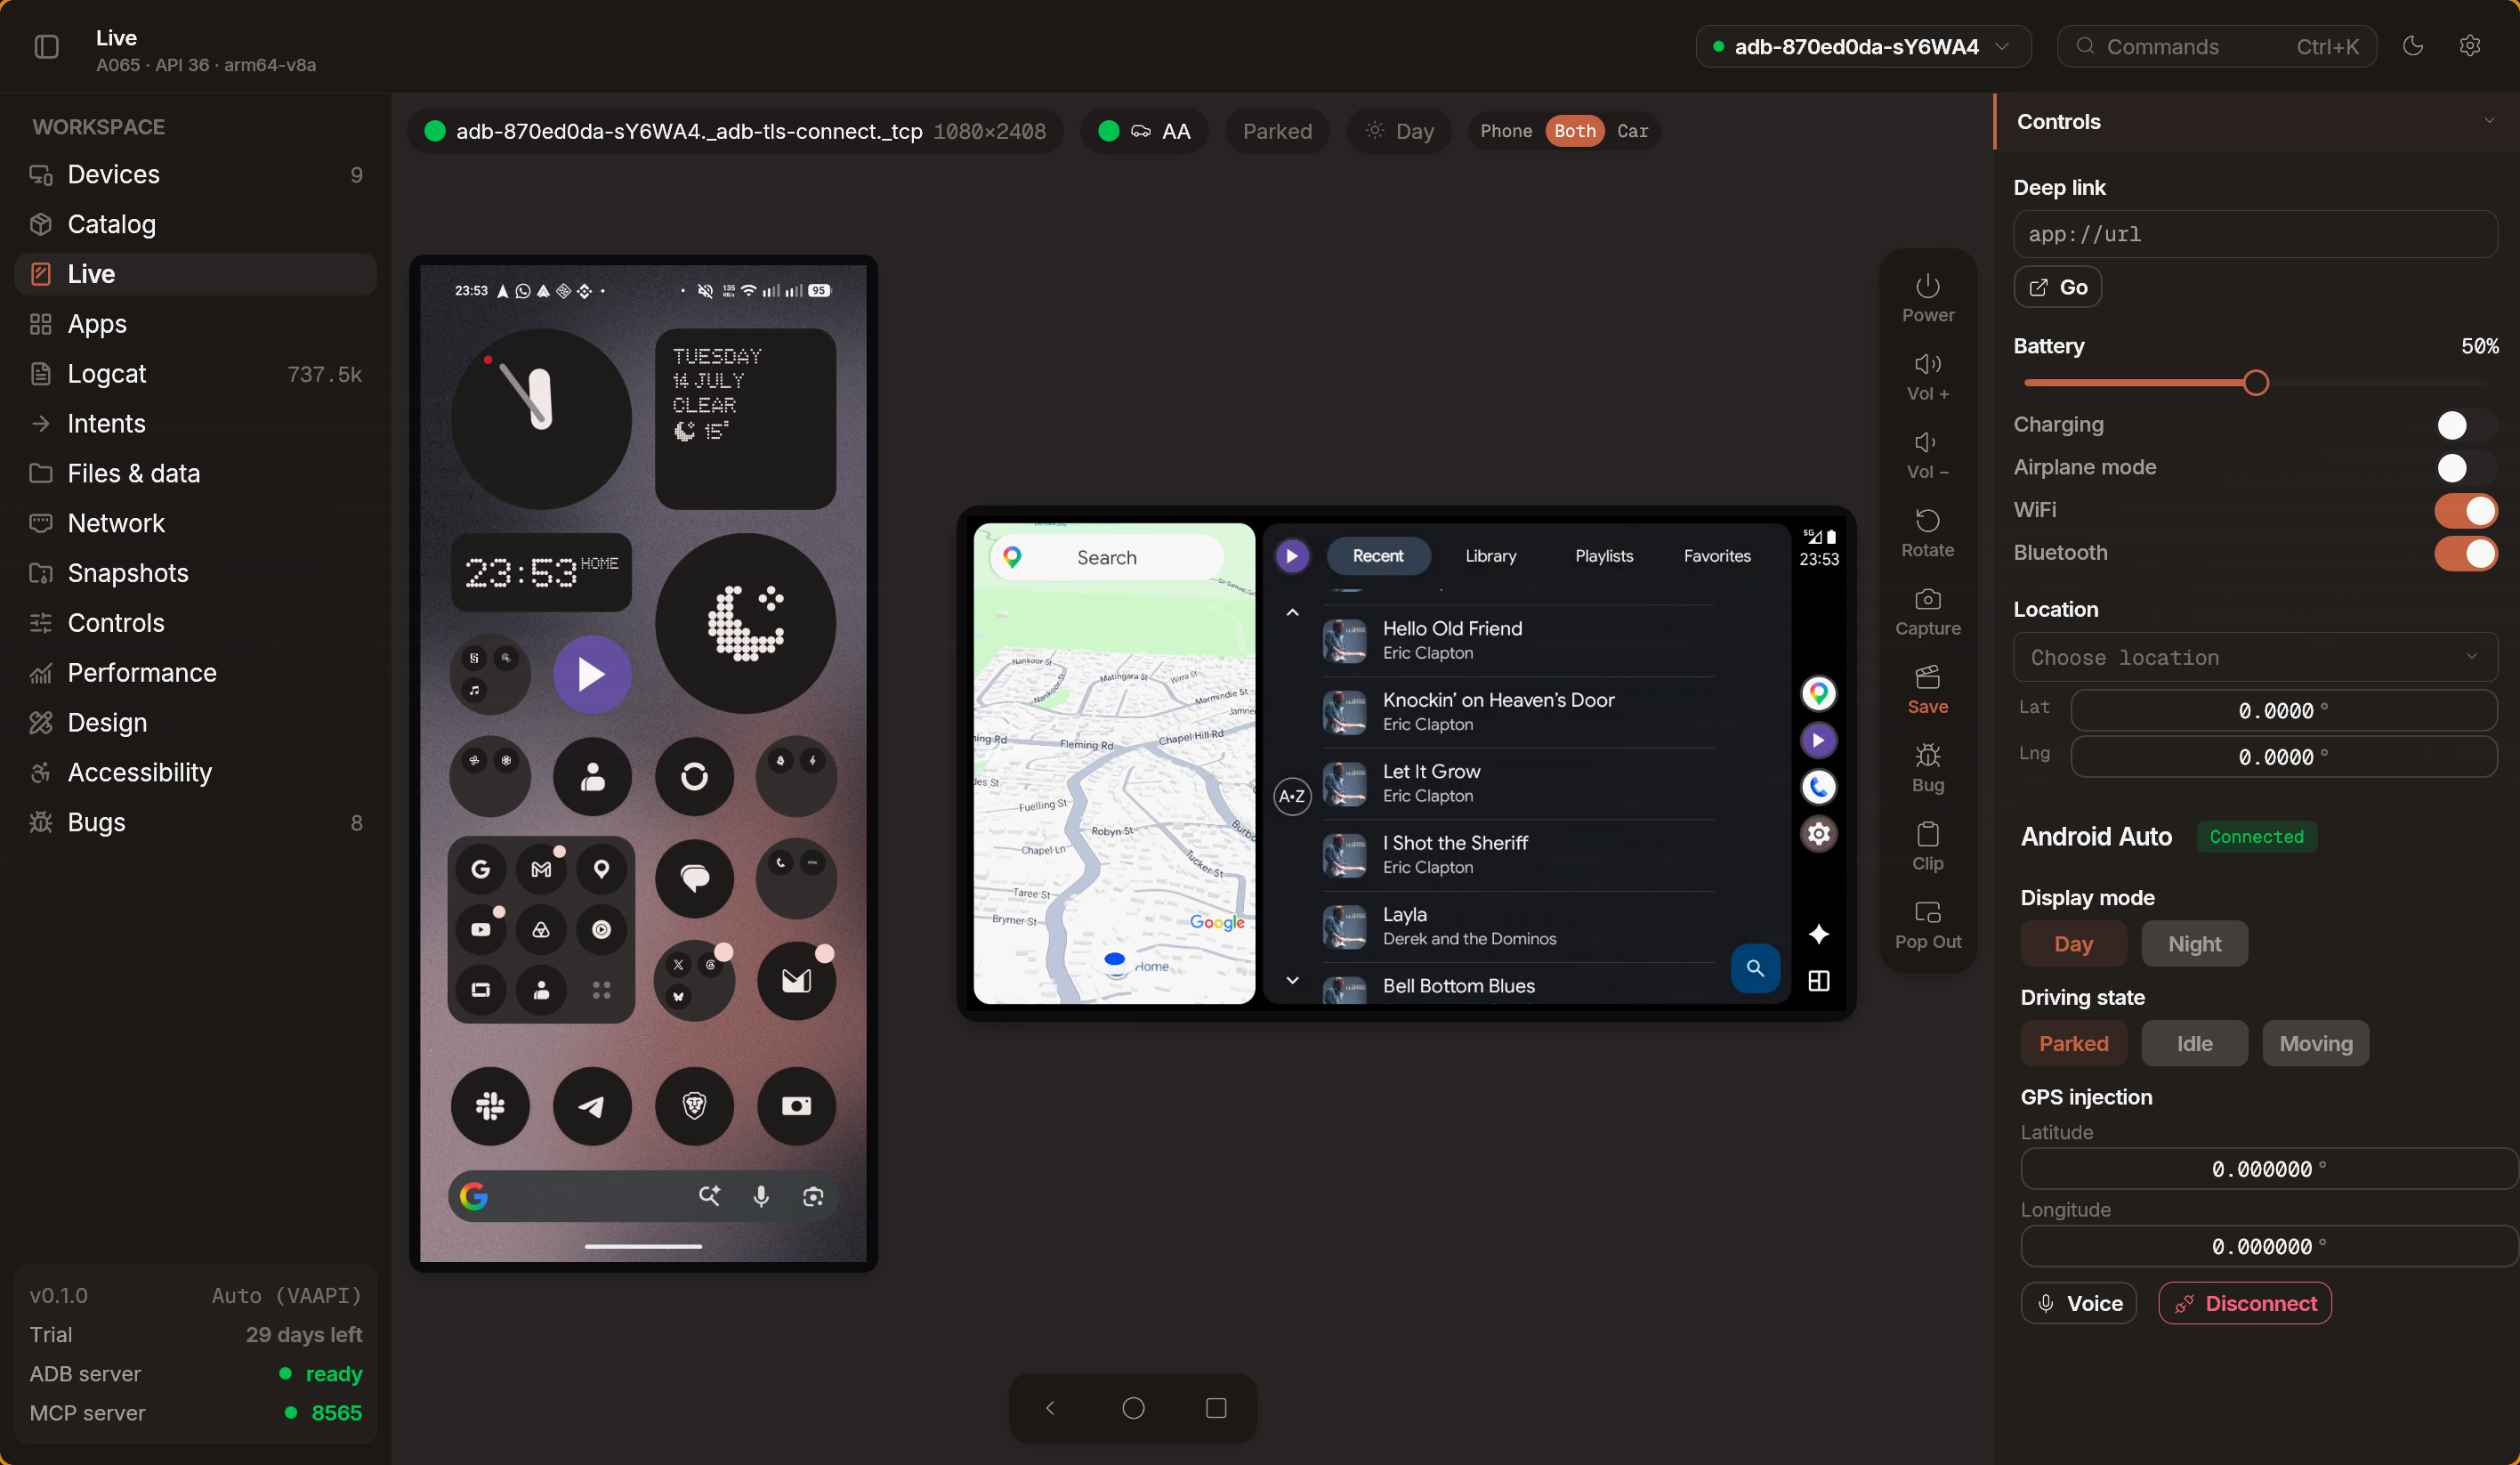
- Open the Android Auto section in the inspector panel and click Connect.
- The head unit display appears in the workspace.
Prerequisites
Section titled “Prerequisites”Android Auto projection requires some one-time setup on the emulator.
-
Install Android Auto
Section titled “Install Android Auto”The stub that ships with most emulator system images does not support head unit projection. You need to sideload a full Android Auto APK sourced externally — it is not available on the Play Store for emulators.
-
Sign in with a Google account
Section titled “Sign in with a Google account”Android Auto requires an active Google account on the device. Open Settings > Accounts and sign in if you haven’t already.
-
Accept permissions
Section titled “Accept permissions”On first connection, Android Auto will prompt you to grant permissions and accept terms. Follow the on-screen prompts on the device.
Media and navigation
Section titled “Media and navigation”Emu surfaces Android Auto metadata in the inspector panel.
- Media playback: Track title, artist, and playback status.
- Navigation: Turn-by-turn navigation status when active.
Vehicle controls
Section titled “Vehicle controls”Emu exposes Android Auto protocol controls in the inspector panel.
- Day/Night mode: Toggle between day and night display modes to test how your app adapts.
- Driving status: Switch between Parked, Idle, and Moving to test how your app responds to driving restrictions.
MCP tools
Section titled “MCP tools”AI agents can interact with the Android Auto head unit using dedicated MCP tools (aa_tap, aa_swipe, aa_screenshot, etc.). See the tool reference for the full list.